PHP is one of the most popular programming languages for the web. Sometimes a feature-friendly language can help the programmer too much, and security holes can creep in, creating roadblocks in the development path. In this tutorial, we will take a look at 5 tips to help you avoid some common PHP security pitfalls and development glitches.
Tip 1: Use Proper Error Reporting
During the development process, application error reporting is your
best friend. Error reports can help you find spelling mistakes in your
variables, detect incorrect function usage and much more. However, once
the site goes live the same reporting that was an ally during
development can turn traitor and tell your users much more about your
site than you may want them to know (the software you run, your folder
structure, etc).
Once your site goes live, you should make sure to hide all error
reporting. This can be done by invoking the following simple function
at the top of your application file(s).
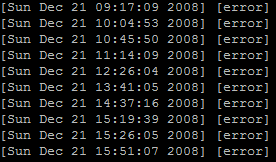
If something does go wrong, you still want and need to know about
it. Therefore, you should always make sure to log your errors to a
protected file. This can be done with the PHP function
set_error_handler.
Tip 2: Disable PHP’s “Bad Features”
From its earliest days, PHP’s designers have always included some
features to make development easier. Or so they thought! Some of these
helpful features can have unintended consequences. I call these “bad
features” because they have allowed data validation nightmares and
created a pathway for bugs to finding their way into scripts. One of
the first things you should do when the development process begins is
disable certain of these features.
Note: Depending on your host, these may or may not be turned off for
you. If you are developing on your own computer or other similar local
environment, they probably won’t be turned off. Some of these features
have also been removed in the upcoming PHP6, but are ubiquitous in PHP4
applications and are only deprecated in PHP5 applications.
Register Globals (register_globals)
In short, register_globals was meant to help rapid application
development. Take for example this URL,
http://yoursite.tld/index.php?var=1, which includes a query string. The
register_globals statement allows us to access the value with $var
instead of $_GET['var'] automatically. This might sound useful to you,
but unfortunately all variables in the code now have this property, and
we can now easily get into PHP applications that do not protect against
this unintended consequence. The following code snippet is just one
common example you will see in PHP scripts:
- if( !empty( $_POST['username'] ) && $_POST['username'] == 'test' && !empty( $_POST['password'] ) && $_POST['password'] == "test123" )
- {
- $access = true;
- }
If the application is running with register_globals ON, a user could
just place access=1 into a query string, and would then have access to
whatever the script is running.
Unfortunately, we cannot disable register_globals from the script
side (using ini_set, like we normally might), but we can use an
.htaccess files to do this. Some hosts also allow you to have a php.ini
file on the server.
Disabling with .htaccess
php_flag register_globals 0
Disabling with php.ini
register_globals = Off
Note: If you use a custom php.ini file that is not applicable to the
entire server, you must include these declarations in every sub folder
that has PHP.
Magic Quotes (magic_quotes_gpc, magic_quotes_runtime, magic_quotes_sybase)
Magic Quotes was a feature meant to save programmers the trouble of
using addslashes() and other similar security features in their code.
There are at least three problems associated with magic quotes. One
problem with this helpful feature is if both magic quotes and
addslashes() are used. If this is the case, then you end up with
multiple slashes being added, causing errors. The second problem is if
you make the assumption magic quotes is turned on and it actually is
not. Then all the input goes unchecked. The third problem is that magic
quotes only escapes single and double quotes, but if you are using a
database engine, there are also many database-specific characters that
also need to be escaped. It is recommended use that you disable this
feature and use proper variable validation instead (see below).
Unfortunately, we also cannot disable magic quotes from the script
side using ini_set. As with register_globals, we can use .htaccess or
php.ini files to do this.
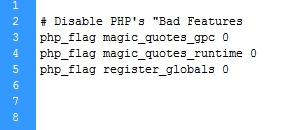
Disabling with .htaccess
php_flag magic_quotes_gpc 0 php_flag magic_quotes_runtime 0
Disabling with php.ini
magic_quotes_gpc = Off
magic_quotes_runtime = Off
magic_quotes_sybase = Off
Note: If you use a custom php.ini file that is not applicable to the
entire server, you must include these declarations in every sub folder
that has PHP.
Tip 3: Validate Input
In addition to escaping characters, another great to way to protect
input is to validate it. With many applications, you actually already
know what kind of data you are expecting on input. So the simplest way
to protect yourself against attacks is to make sure your users can only
enter the appropriate data.
For example, say we are creating an application that lists users
birthdays and allows users to add their own. We will be wanting to
accept a month as a digit between 1-12, a day between 1-31 and a year
in the format of YYYY.
Having this kind of logic in your application is simple and regular
expressions (regex) are the perfect way to handle input validation.
Take the following example:
- if ( ! preg_match( "/^[0-9]{1,2}$/", $_GET['month'] ) )
- {
-
- }
- if ( ! preg_match( "/^[0-9]{1,2}$/", $_GET['day'] ) )
- {
-
- }
- if ( ! preg_match( "/^[0-9]{4}$/", $_GET['year'] ) )
- {
-
- }
In this example, we simply checked (in the first two if statements)
for integers [0-9] with a length of one or two {1,2} and we did the
same in the third if statement, but checked for a strict length of 4
characters {4}.
In all instances, if the data doesn’t match the format we want, we
return some kind of error. This type of validation leaves very little
room for any type of SQL attack.
Regex expressions like those above can be a little difficult to
grasp at first, but explaining them is out of the scope of this
article. The
php manual has some additional resources to help you with validation. The PEAR database also has a few packages such as the
Validate package to help with emails, dates, and URLS.
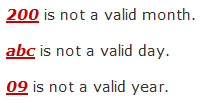
Below is an example of the above script in action using 200 as an input for a month, abc for the day and just 09 for the year.
Tip 4: Watch for Cross Site Scripting (XSS) Attacks in User Input
A web application usually accepts input from users and displays it
in some way. This can, of course, be in a wide variety of forms
including comments, threads or blog posts that are in the form of HTML
code. When accepting input, allowing HTML can be a dangerous thing,
because that allows for JavaScript to be executed in unintended ways.
If even one hole is left open, JavasScript can be executed and cookies
could be hijacked. This cookie data could then be used to fake a real
account and give an illegal user access to the website’s data.
There are a few ways you can protect yourself from such attacks. One
way is to disallow HTML altogether, because then there is no possible
way to allow any JavaScript to execute. However, if you do this then
formatting is also disallowed, which is not always an option for forum
and blog software.
If you want HTML mostly disabled, but still want to allow simple
formatting, you can allow just a few selected HTML tags (without
attributes) such as <strong> or <em>. Or, alternatively,
you can allow a popular set of tags called “BBCode” or “BB Tags,”
commonly seen on forums in the format of [b]test[/b]. This can be a
perfect way to allow some formatting customization while disallowing
anything dangerous. You can implement BBCode using pre-existing
packages such as
HTML_BBCodeParser or write your own BBCode implementation with regular expressions and a series of
preg_replace statements.
Tip 5: Protecting against SQL Injection
Last, but not least, is one of the most well-known security attacks
on the web: SQL injection. SQL injection attacks occur when data goes
unchecked, and the application doesn’t escape characters used in SQL
strings such as single quotes (‘) or double quotes (“).
If these characters are not filtered out users can exploit the system by making queries always true and thus allowing them to trick login systems.
Luckily, PHP does offer a few tools to help protect your database
input. When you are connected to an sql server you can use these
functions with a simple call, and your variables should be safe to use
in queries. Most of the major database systems offered with PHP include
these protection functions.
MySQLi allows you to do this in one of two ways. Either with the
mysqli_real_escape_string function when connected to a server:
- $username = mysqli_real_escape_string( $GET['username'] );
- mysql_query( "SELECT * FROM tbl_members WHERE username = '".$username."'");
Or with prepared statements.
Prepared statements are a method of separating SQL logic from the data being passed to it. The functions used within the MySQLi library filter our input for us when we bind variables to the prepared statement. This can be used like so (when connected to a server):
- $id = $_GET['id'];
- $statement = $connection->prepare( "SELECT * FROM tbl_members WHERE id = ?" );
- $statement->bind_param( "i", $id );
- $statement->execute();
One thing to note when using prepared statements is the “i” in bind_param. i stands for for integer but you can use s for string, d for double, and b for blob depending on what data we are passing.
Although this will protect you in most circumstances, you should
still keep in mind proper data validation as mentioned previously.
Closing
This short tutorial can only scratch the surface of web security.
Ultimately, it is up to developers to ensure that the applications they
build are safe by educating themselves about the dangers of the web and
the most common kinds of vulnerabilities and attacks. If you wish to
read more about security issues in PHP, there is a section on
security in the php manual devoted to them.
What are your tips?